Vanagon Rust: Patch Panels and Fixes
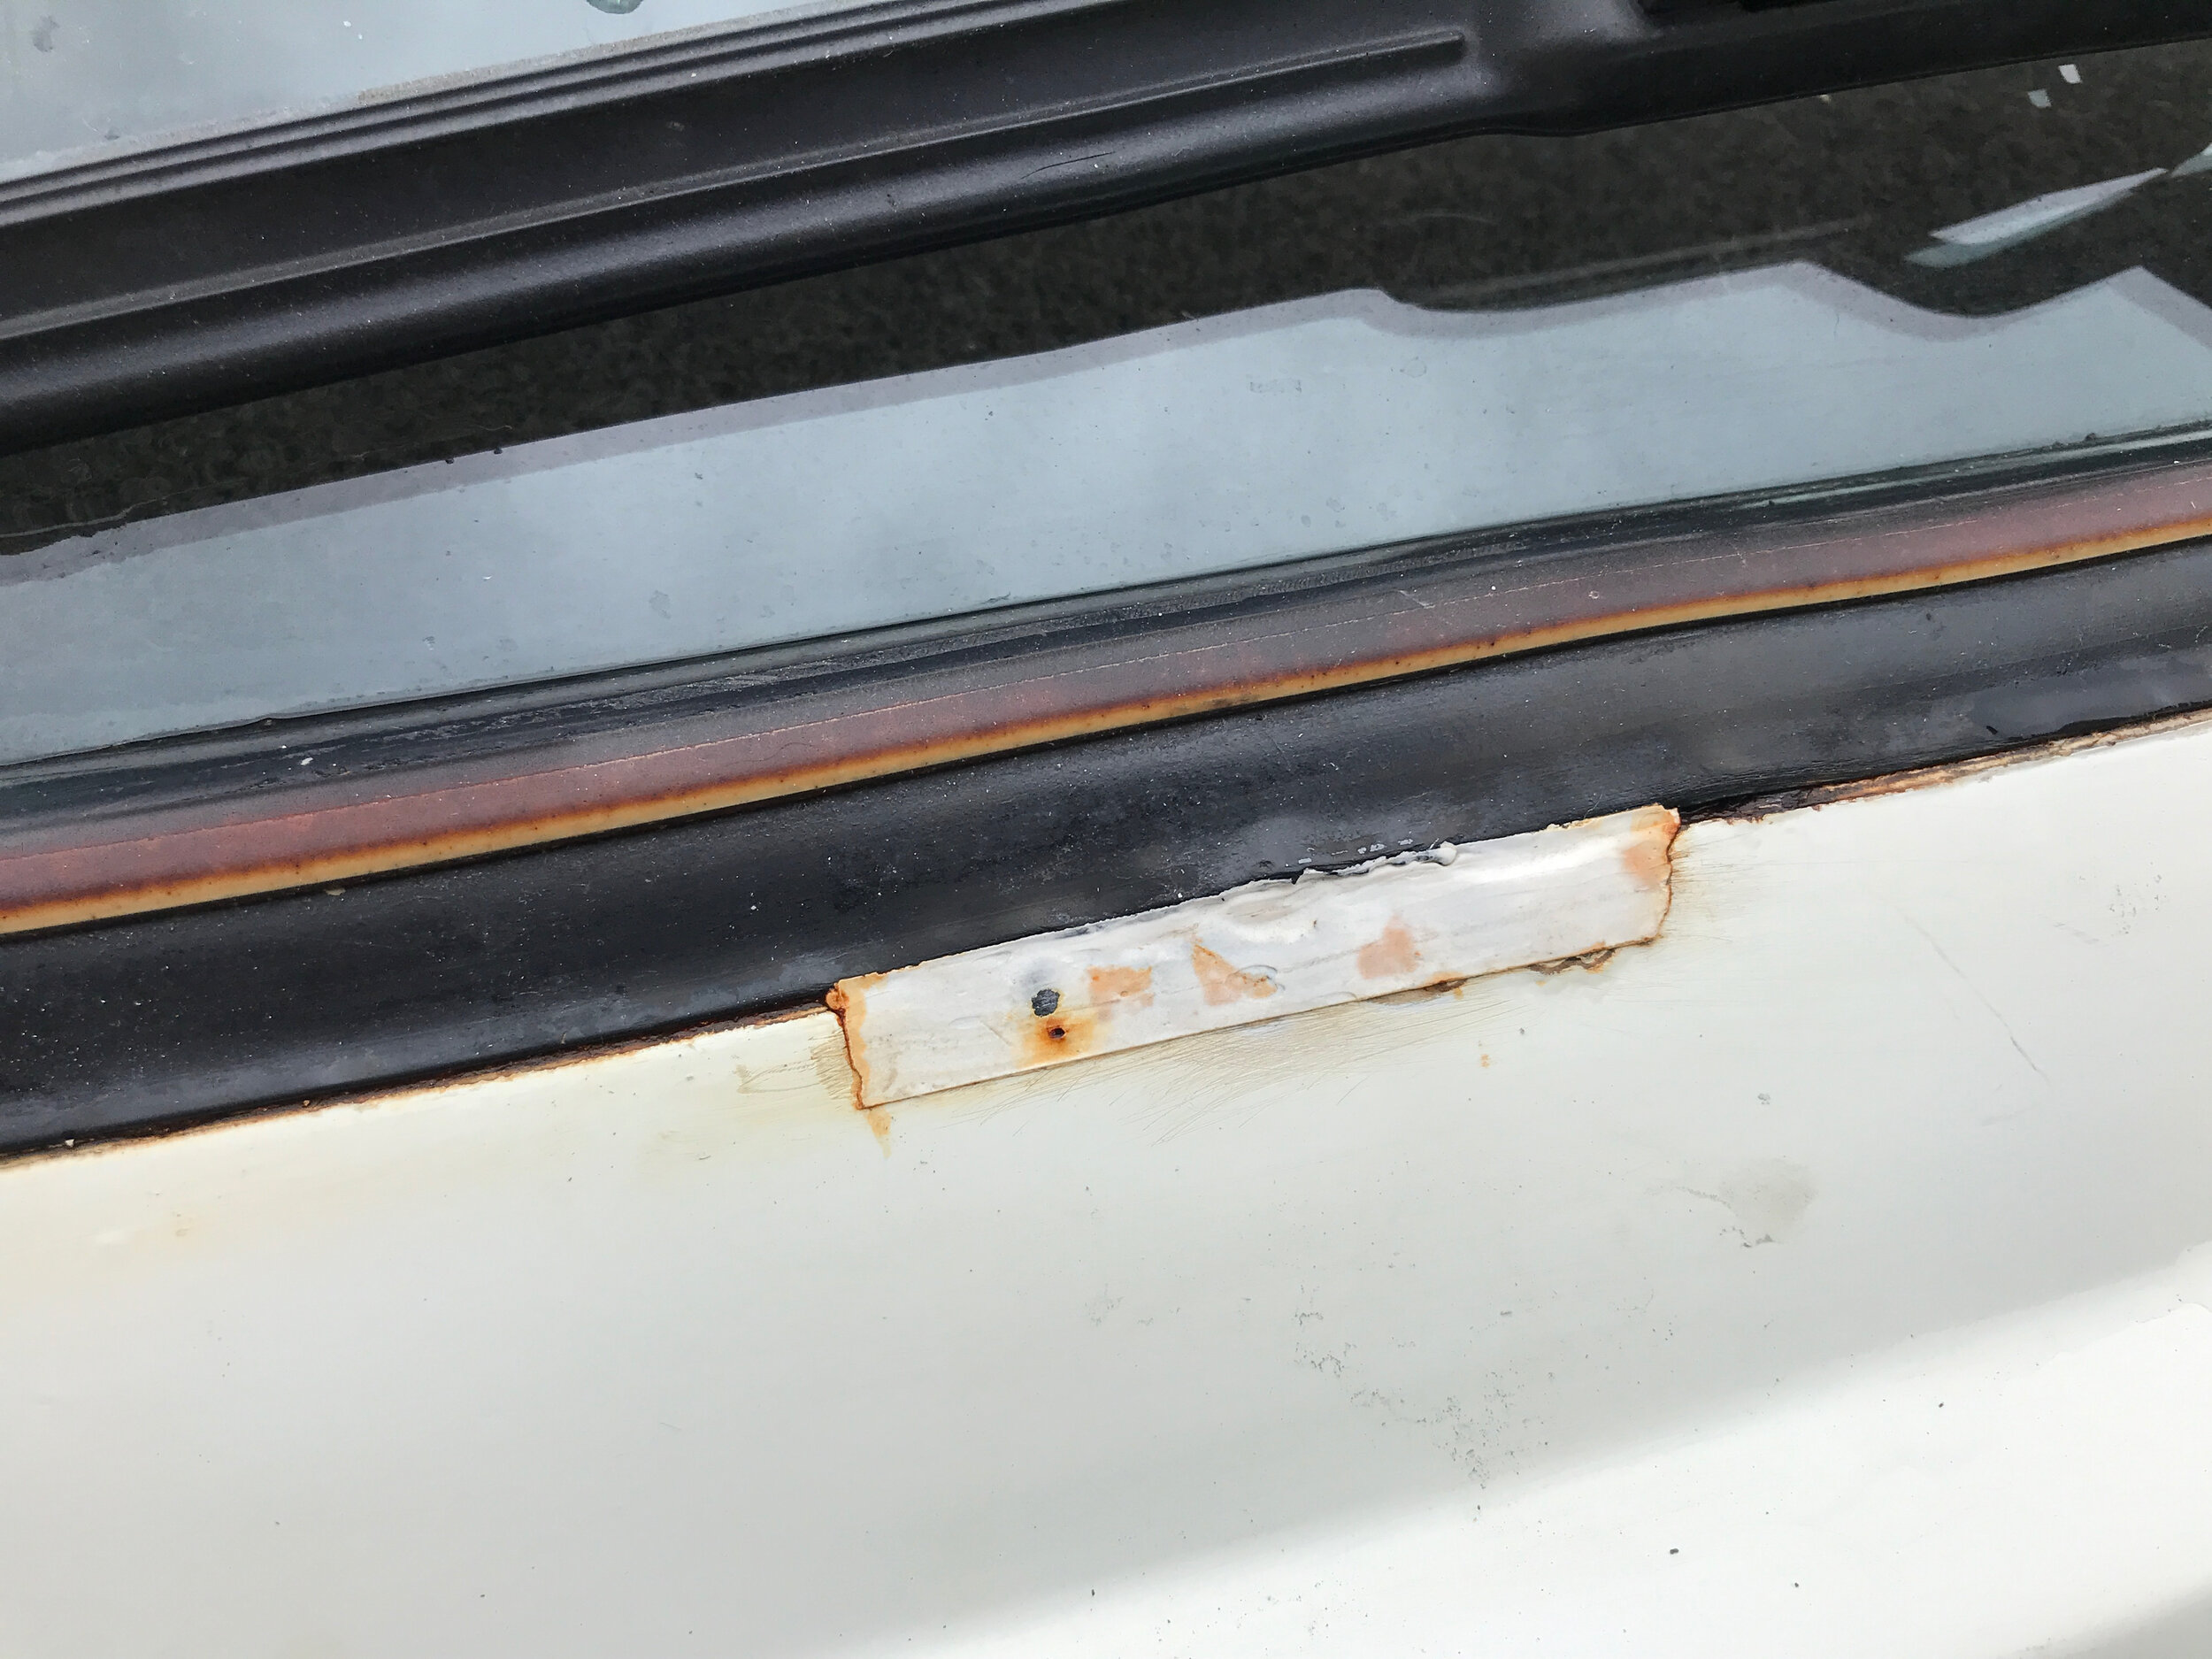
This is what rust does to an old VW. It’s probably been sitting under the windshield for decades.
Update 2024: It’s been over a year since I repaired rust on the Vanagon. Overall the project went well and the rust is gone. If I did it again I would rent an airless sprayer and learn to weld. Those two skills are critical. Everything I’m writing about is common knowledge. But my experience is unique because I had never removed a windshield from a Vanagon… it was too intimidating.
With welding skills, I would have done the entire job. But welding, grafting metal, shaping metal, etc. takes years of experience. As for the windshield glass installation, that’s a two-person job. I cracked my windshield attempting to re-install it. Call a pro.
When I finally found a qualified metal welder he charged $400 to create the patch panels and to braze the smaller rust holes that I eventually found. His estimate was based on the photos I sent him after I had removed the windshield. That might sound expensive to someone not familiar with the trade, but it was cheap considering the damage the rust was causing under the paint.
Had I allowed the rust to continue the damage would have invaded other areas under the dash. Incidentally, “seam rust” is completely different than this type of damage found around window glass and seals.
I rewrote the original post recently because I don’t think the previous edition clearly showed any pattern on how I went about repairing the rust damage to my ‘86 Westy.
If you own a Vanagon, or if you are contemplating buying one that has signs of rust around the window glass areas, determine exactly where the rust is coming from before you do anything. Cracked and worn glass seals are a culprit. Rainwater creeps under the seals and sits there eating away at the metal. The “lower” two corners of the front and rear window glass are common areas to find rust. By design, I think the front contour of the windshield allows water to pool in the corners. I noticed that after washing the van. The front glass is poorly angled to allow it to happen.
The steps below show the process. Your situation is likely different. These steps will give you an idea of how the rust repair project unfolded on my van.
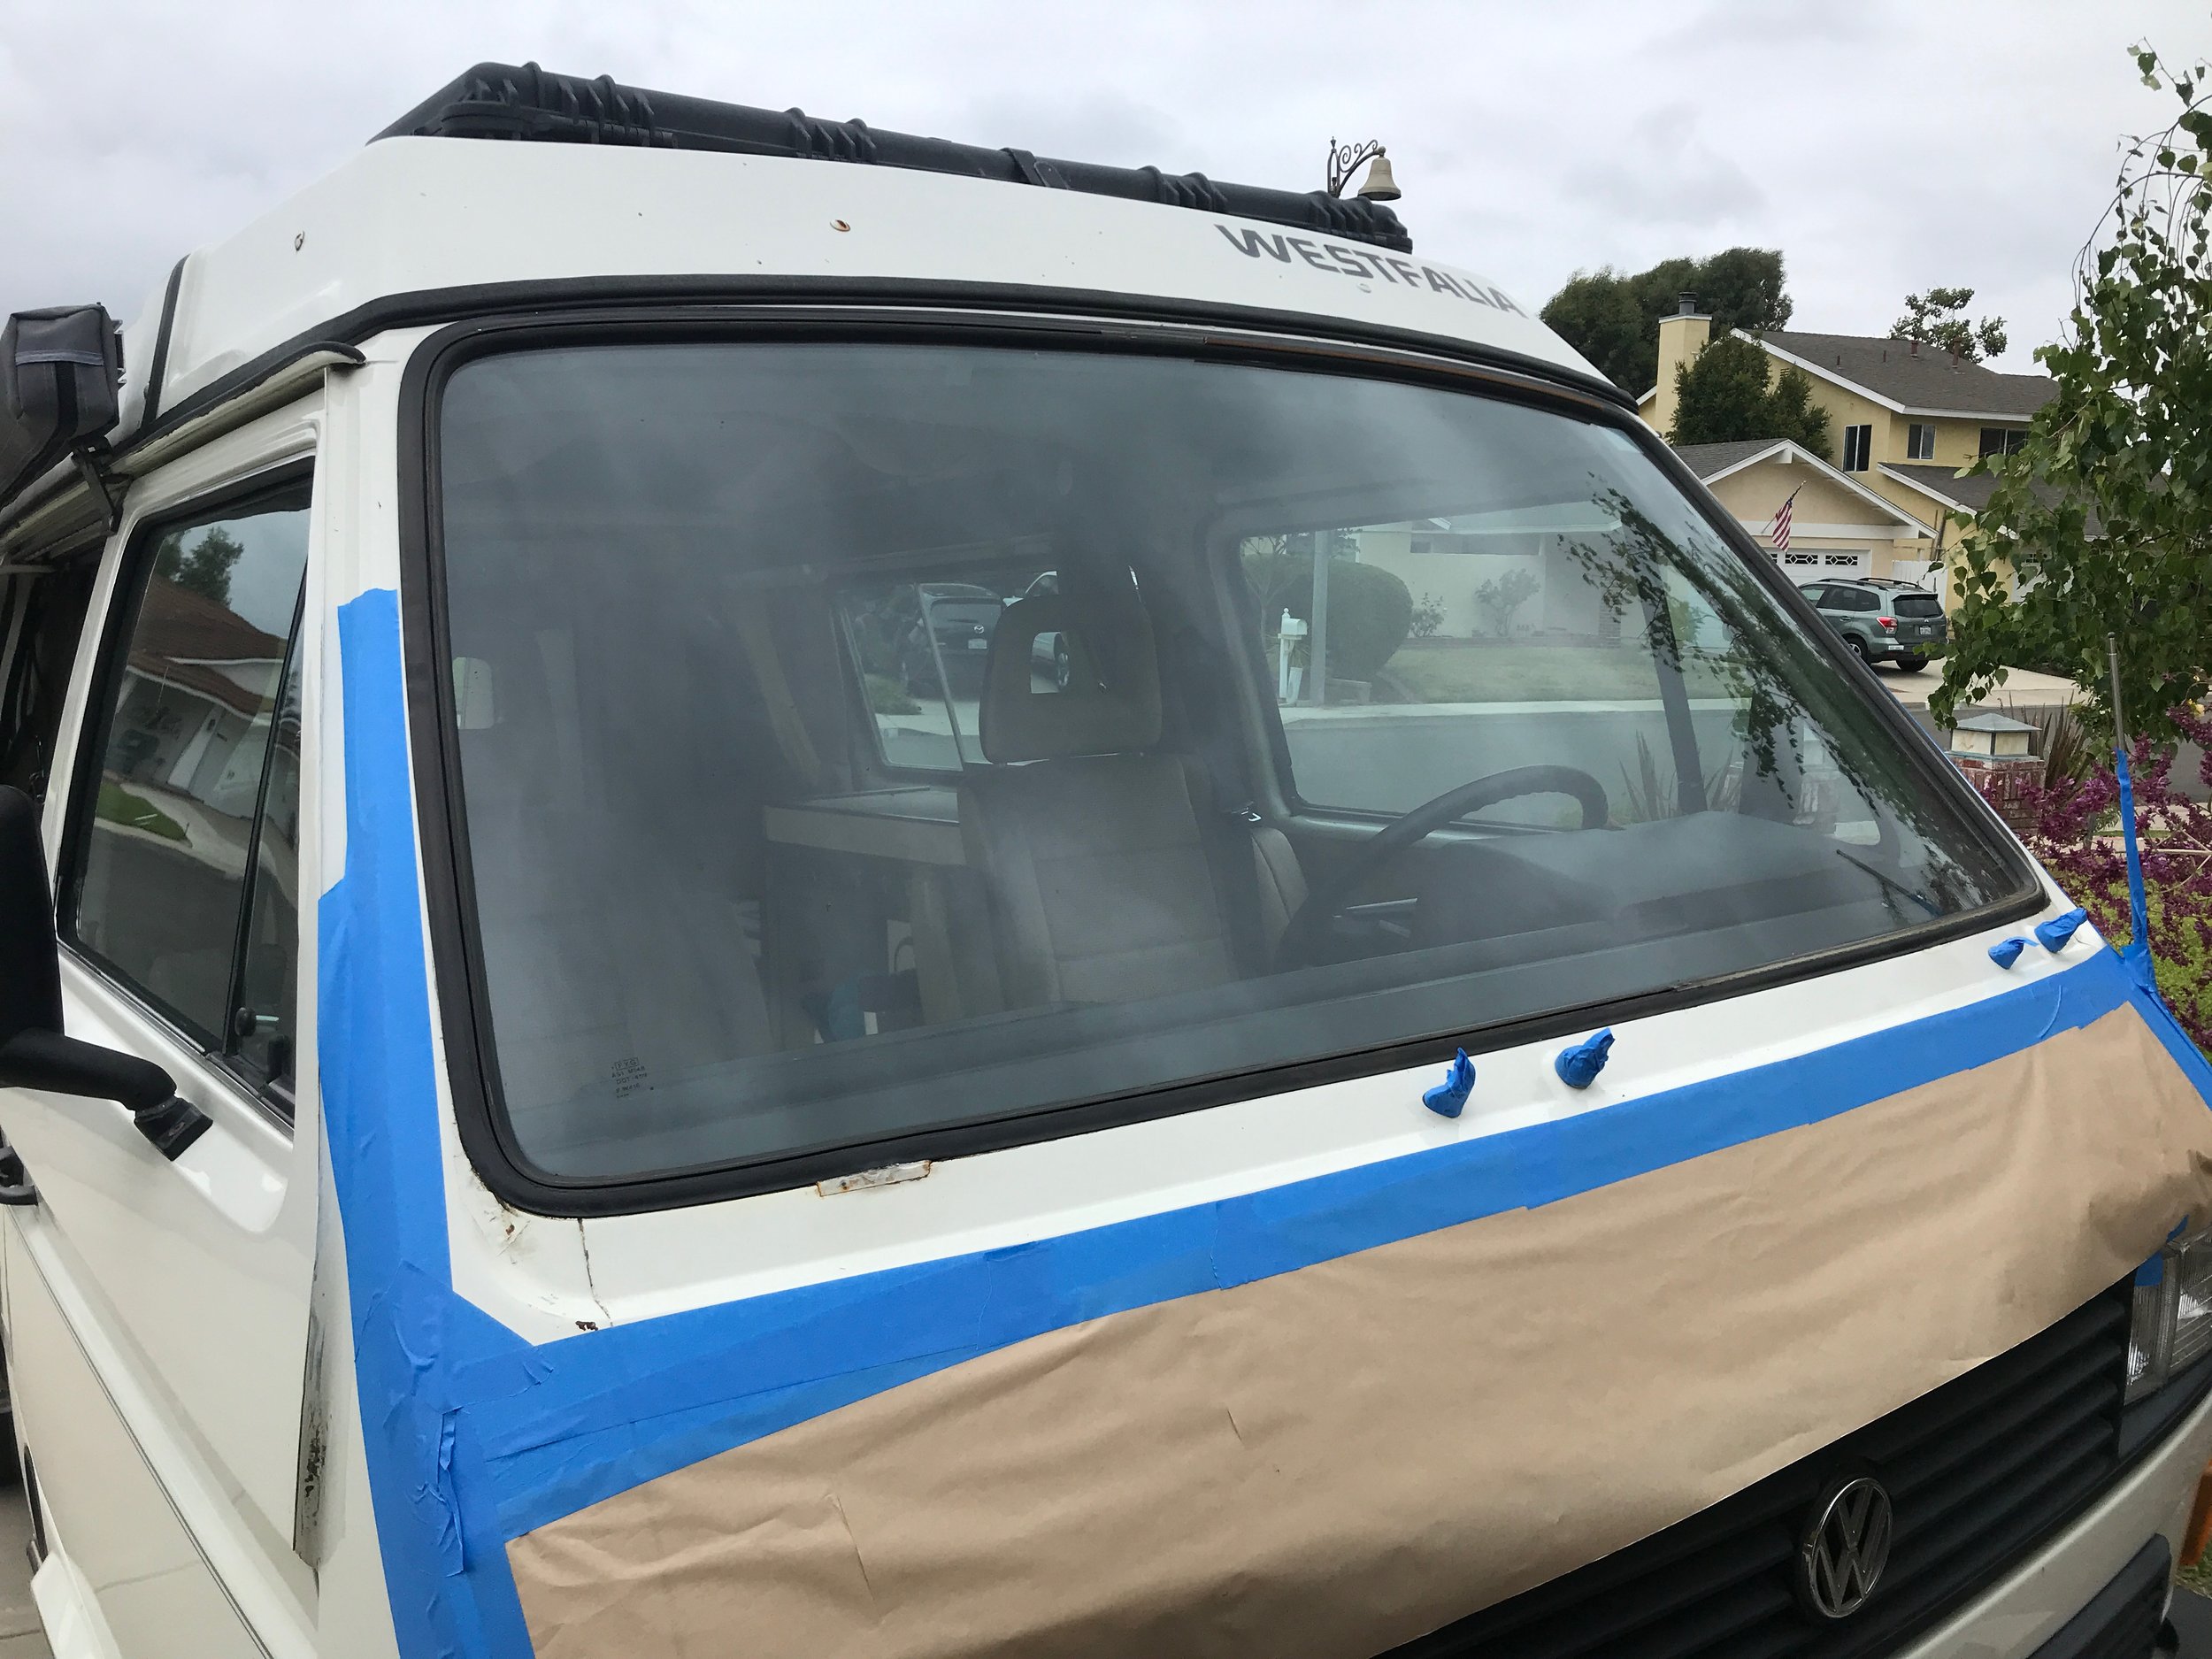
Step 1) My rust appeared in three areas of the front windshield channel. I only saw the portion of rust that wasn’t covered by the rubber seal. My first job was to remove the windshield and factory weather seal. Easy.
Step 2) I worked out of my garage. I also had a backup vehicle to run errands. Both things helped the process move forward.
Step 3) I created a list of products and supplies. I learned a pneumatic grinder is a must-have item. Different grades of automotive sandpaper (wet and dry) are needed, body filler, spot putty, primer, clear, and paint color. I used rattle can products and they worked okay. But an airless sprayer would have been much better, but more expensive. The higher the psi the better the finish. I ordered everything I needed before I began the project. My working space was clean and functional. I was ready to go.
Step 4) Again, my project was limited to the front windshield. Removing the rubber seal was simple. But ask a friend for help. It is a bit awkward to handle alone.
This is my moment to see how much rust damage I had under the seal. The damage was bigger than expected. I used a metal awl to scrape away the rust and the hole grew and grew. That was okay. I knew it was going to be bad. I also knew the area on the opposite side of the rusted metal had to be treated/or removed.
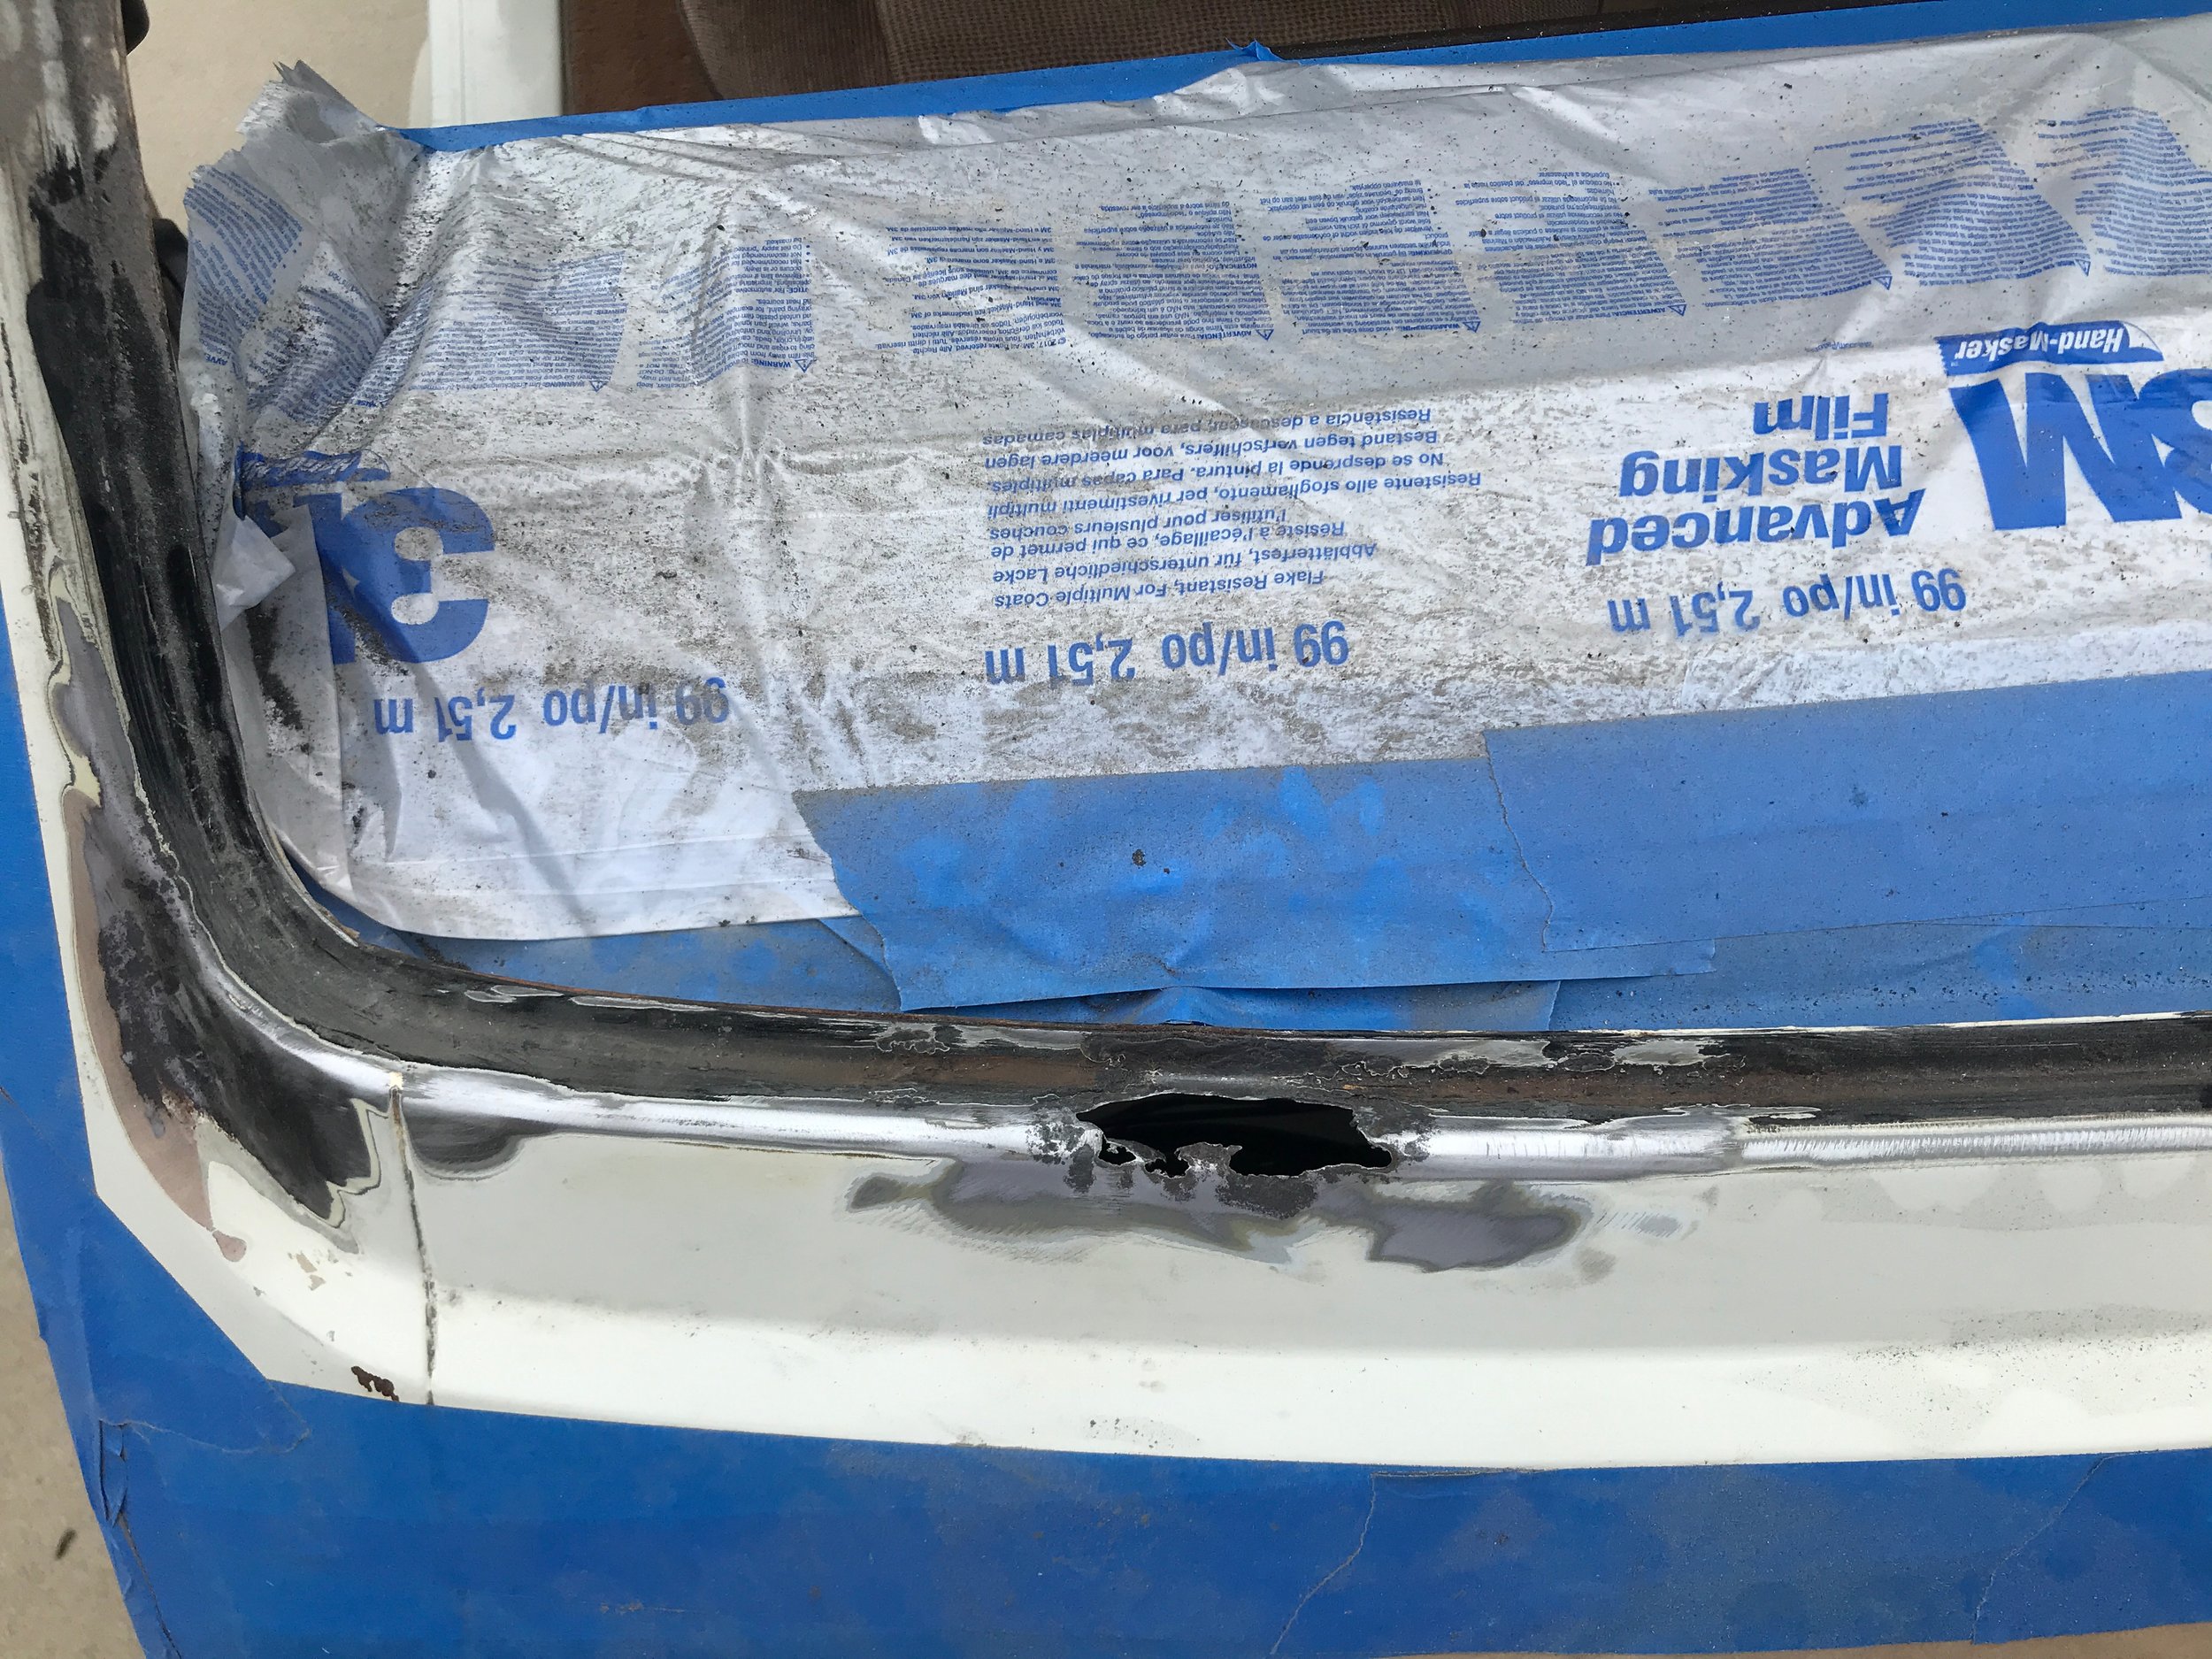
Step 5) As I said, I was working on the front windshield channel so I might have removed the dash if necessary. But as it turned out I didn’t need to do that. Removing a Vanagon dash is not a big deal though. With my project, I had a clear line of sight on the main rust hole (see photo) from under the dash with the glove box removed. That helped because the welder asked if he could access it from underneath.
A side note: Buy good quality automotive masking tape. Try to buy your color, clear, primer, sandpaper, and filler from an automotive paint supply business… not a big box store.
It seems like a lot of work doesn’t it? I know that I hesitated for months before I tackled my rust issue on the windshield. I was so concerned that I couldn’t do the bodywork myself that I procrastinated and never started the process.
It doesn’t matter where the rust is on your vehicle. Some of this story will apply to any rust that requires body work, or patch panels. Surface rust is no big deal. Light sanding, primer, and color coat are about it. Maybe an encapsulator for rust, too. But with serious rust, where the metal is eaten away… requires a professional patch repair.
Some bigger patch body panels for Vanagon are available. Van Cafe has a selection of panels. I can’t vouch for the quality, but I have seen different panels or sections of panels online.
Most people end up having to fabricate something. Don’t listen to friends that say metal patchwork is easy, or that you can just fill a rust hole with anything (like putty). That isn’t true. And applying fillers directly over rust won’t stop it from returning.
And ignore anyone who tells you to plug it with some type of cheap metal filler. Unless it is the size of a pinhole it won’t last. Why would anyone think that’s correct?
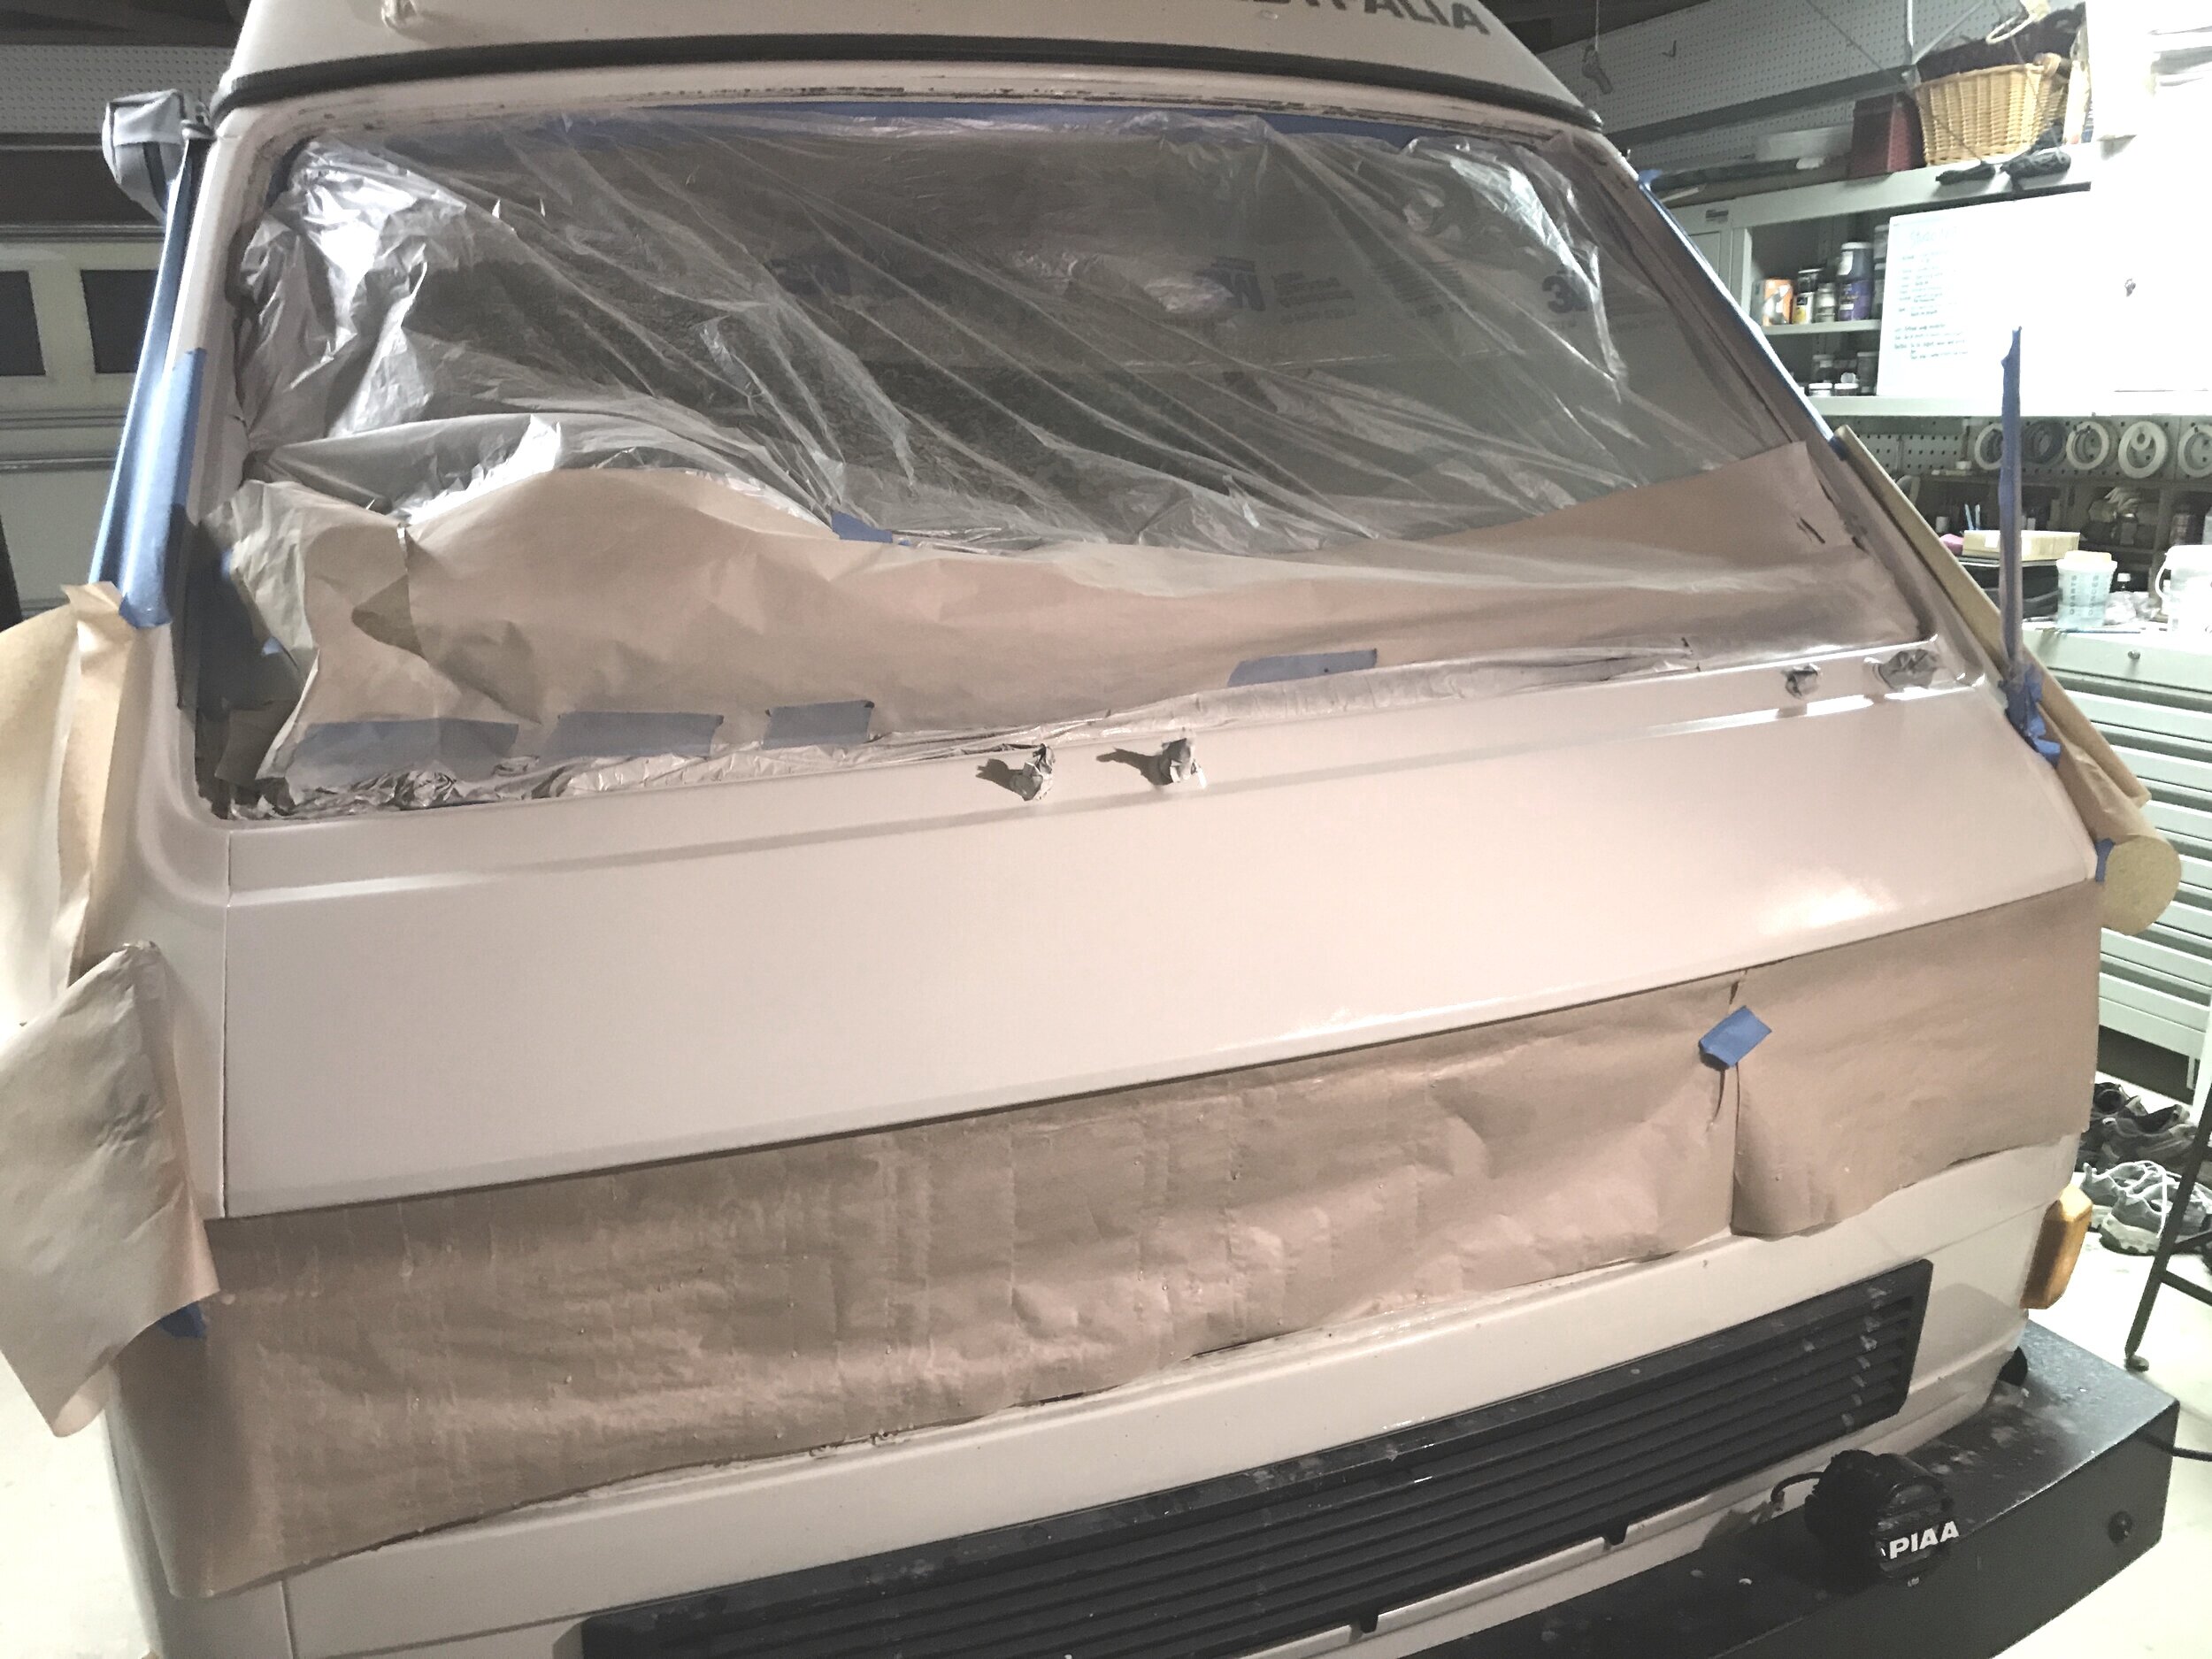
Step 6) Back to my project. I masked everything. I didn’t want to sand or grind until the area was sealed. I also planned to repaint more than just the damaged area at the windshield channel… so I spent hours masking with both brown paper and clear plastic from 3M.
I sanded the original paint down to the bare metal where the metal had rust damage. I only lightly sanded the panel color below the windshield, which you see in the photos.
I used a pneumatic angle grinder on the windshield channel to clean it up. I found a super cheap one from Harbor Freight that cost under $20. Later it would be used to smooth the welds.
There are lots of videos on YouTube that explain how to mask for bodywork, how to paint, how to apply body filler, etc. I watched hours of it before I started.
Step 7) Again, with my project this was a step where I had to transport the Vanagon to the welder’s shop. It would be in his hands. He said I did a good job at cleaning up the rust, and that gave me some confidence. About two days passed and he called and said the Vanagon was ready for pickup. I hussled over there and drove it back to my garage.
Step 8) Once the small “patch panel” was welded at the windshield channel section, I ground down the welds with an angle grinder. and then hand sanded the channel using 60-grit paper and then moved to 80 grit. That #grit cut through the factory paint easily by the way.
If you also find a huge rust hole at any of your windows read the next step carefully.
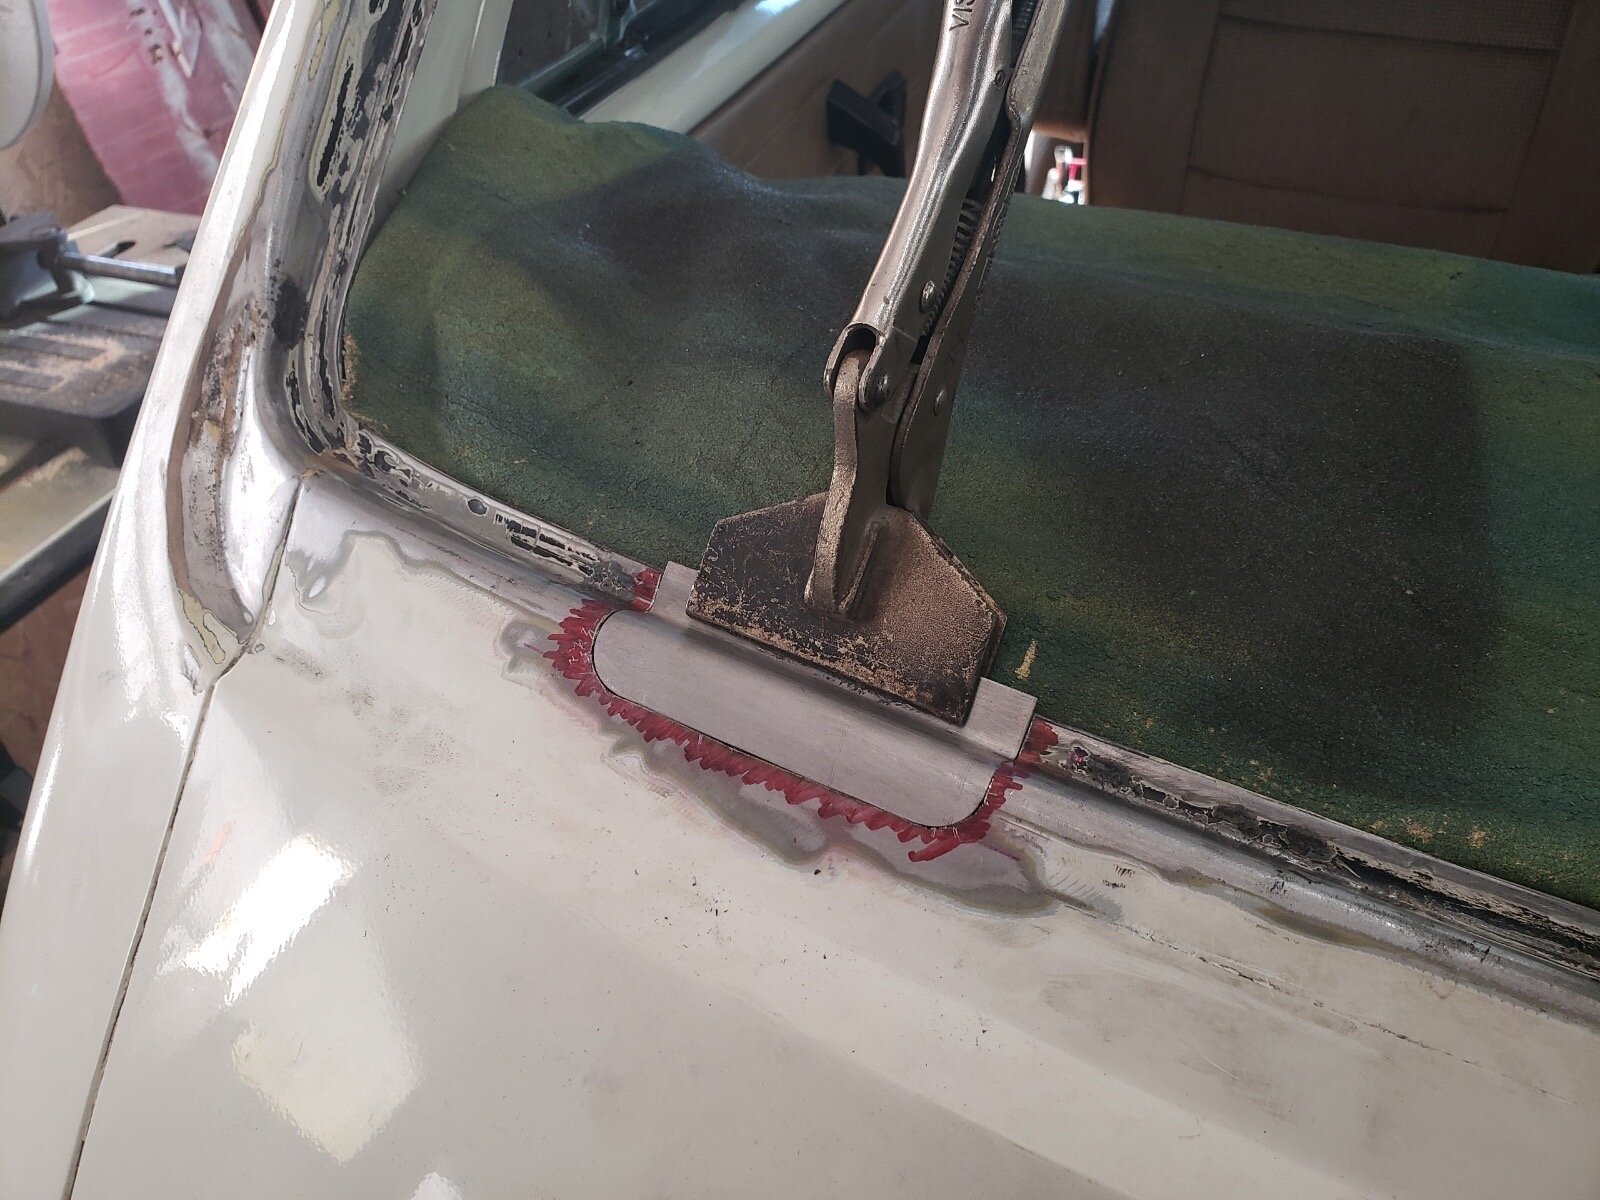
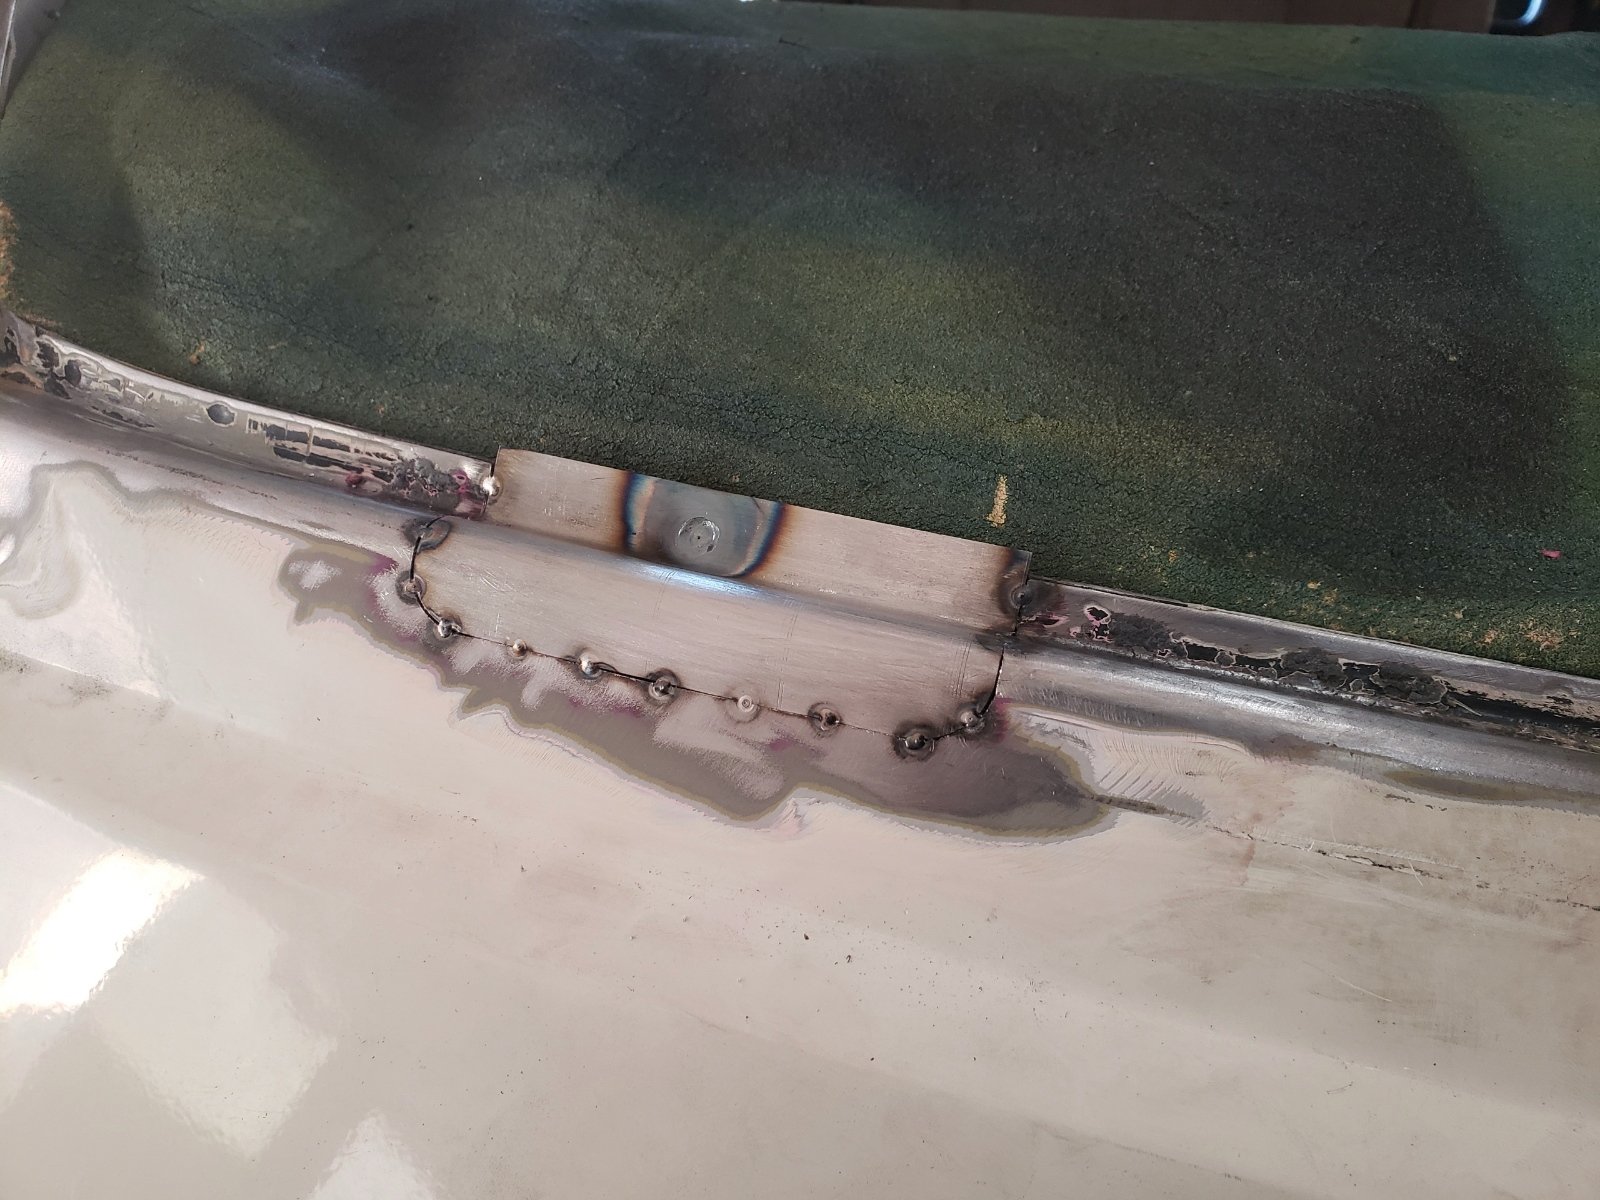
Step 9) Why a metal patch? It’s the only way to prevent rust. They’ve been used for decades in the restoration business. They are a fitted metal patch (replica of the original metalwork) that follows the exact thickness and curvature of the original metalwork on your vehicle. These are often fabricated by hand and then “tacked” into place using MIG or TIG. Weld beads seal the gaps between the metal, and then the entire area is ground smooth.
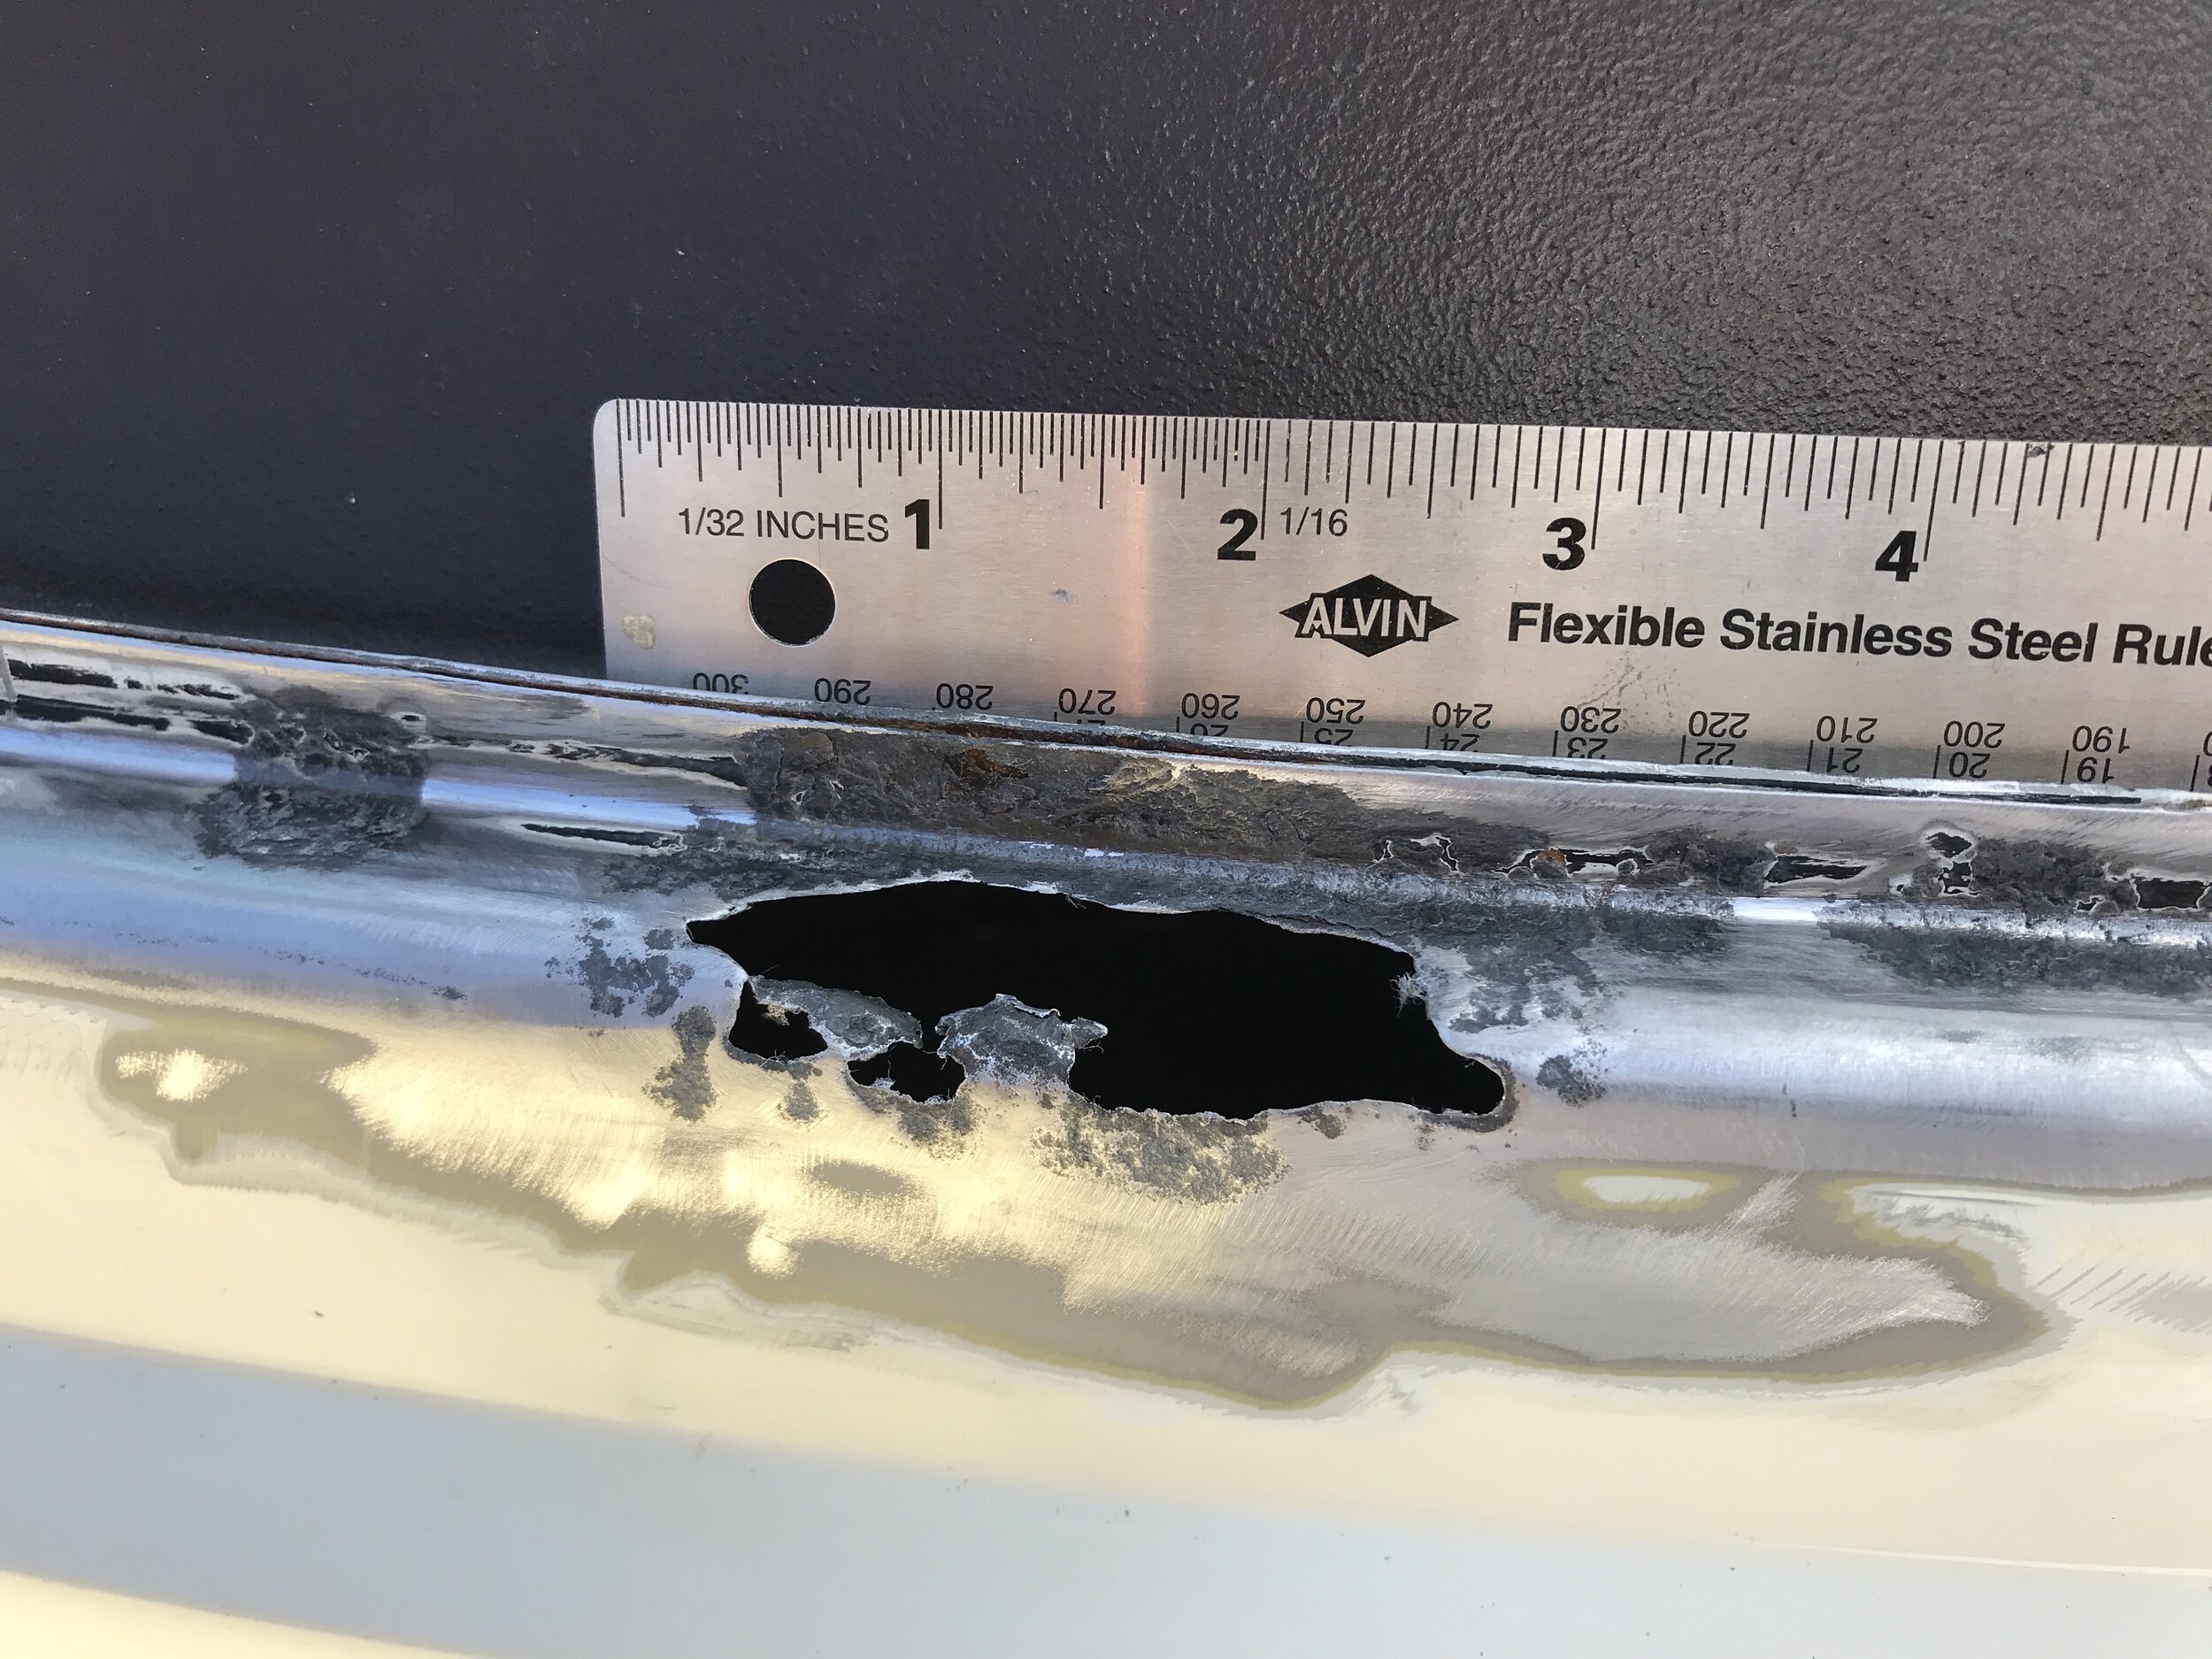
You can see that the hole I found was several inches long. It didn’t look that huge at first, but the more I picked away at the rust with an awl, the bigger it got.
Do not be afraid to clean out a rust hole. You are going to replace that entire section with new metal anyway. You have to determine exactly how much of the original metal is rusted and where the rust stops and the good metal begins.
Again I emphasize…I found my welder/fabricator online. Be sure they know what they are doing because it’s really easy to screw it up and make the repair job worse. The welder should be experienced in patch panel fabrication, and TIG, MIG, and Gas. Automotive metalwork is a particular skill
Not all welders will travel to you. So you must establish that before you hire one. What my welder cut out was about 2.25 inches long. Kielbasa Industries is the name of his shop. It’s located in Orange, California. Kiel actually had a complete section of the windshield B-pillar from another Vanagon, unfortunately, it was already sold to another customer by the time I got there. His jobs are priced reasonably. But he’s not cheap. He can be reached at kielbasavw@gmail.com. Or by calling (714) 471-3778.
Be careful that you follow the original bodyline if you fabricate a patch. Welding a patch with the wrong heat range will warp the metal around it.
Step 10) Now that the restoration metalwork was finished I needed to do the final bodywork. I’m an amateur at bodywork. I studied every YouTube video I could find. I will tell you that I was quoted more than $1,000 for the same job I did for under $700 (not including the new windshield). The trouble with body shops is that they all do things differently. One shop may just slap on Bondo and another may do it the right way and replace the metal. You really don’t know what kind of work you’ll get until you ask the hard questions.
I ground down the small area of welds that Kiel left me (and they were super small and smooth) and then I went to work with the body filler. Working with small layers of filler and some spot putty I learned not to be afraid to make a mistake. You can always sand it off and start again.
I learned to be patient and well-organized. If I didn’t like how the filler looked, I sanded it down and re-applied it. I used very thin layers and thanks to the metal patch I didn’t need much. That’s why patch panels are so great. Use as little filler as you can, but you have to use enough to cover the transitions between the new metal patch and the original metalwork by VW.
In this step, you are simply doing the bodywork, not the finished paint. But you still have to mask well because you will be creating a lot of harmful dust. Wear glasses and a respirator. When my filler dried I used the grinder using 80 grit. That cut it down enough to hand-sand the rest.
I went from 80-grit to 100-grit paper and then to 400-grit and up to 800 grit. The last paper I used was 2,000 grit. Watch for high and low spots.
Step 11) Once I was satisfied that I had sanded it smooth/flat and level, I filled any tiny air pits (and low spots) with spot filler. It’s easy to use spot filler. I sanded it again using wet-dry sandpaper up to 2,000 grit.

With the glovebox on my ‘86 Vanagon removed I could see the underside of the major rust hole. I was lucky. After the patch was tack welded on the outside I went in and sanded the rust from the inside. It was mostly surface rust. I then applied a rust inhibitor, followed by a coat of primer. Later I color matched it as close to original as possible. It really doesn’t matter if it’s perfect because you will never see it. But what this does is ensure that the rust won’t come back.
I was ready for the primer coat at this point. Be sure to buy a quality primer, don’t run down to Home Depot. Buy from a quality paint and body shop if possible. I used Eastwood for my primer. They make a really good rust inhibitor too, which I will explain in a moment.
Step 12) The next thing I did was tackle the underside of the metal channel. I sanded it really well from inside the vehicle once the glove box was removed (see photo).
I then used an Eastwood rust inhibitor/encapsulator that converts surface rust to metal. It comes in a spray or brush-on application. Then I sanded again and primed the area, and using my color I sprayed it. Wait for the primer to dry before you spray color.
Step 13) Now that the backside of the patch panel area (where the hole was) was repaired I moved back to the outside again and began the final stages of sanding and priming before the color coat. Wet sanding was the trick. A 2,000-grit wet sand was critical at this stage. It takes a while to get rid of scratches caused by rough grits, but be patient because it pays off to wet sand.
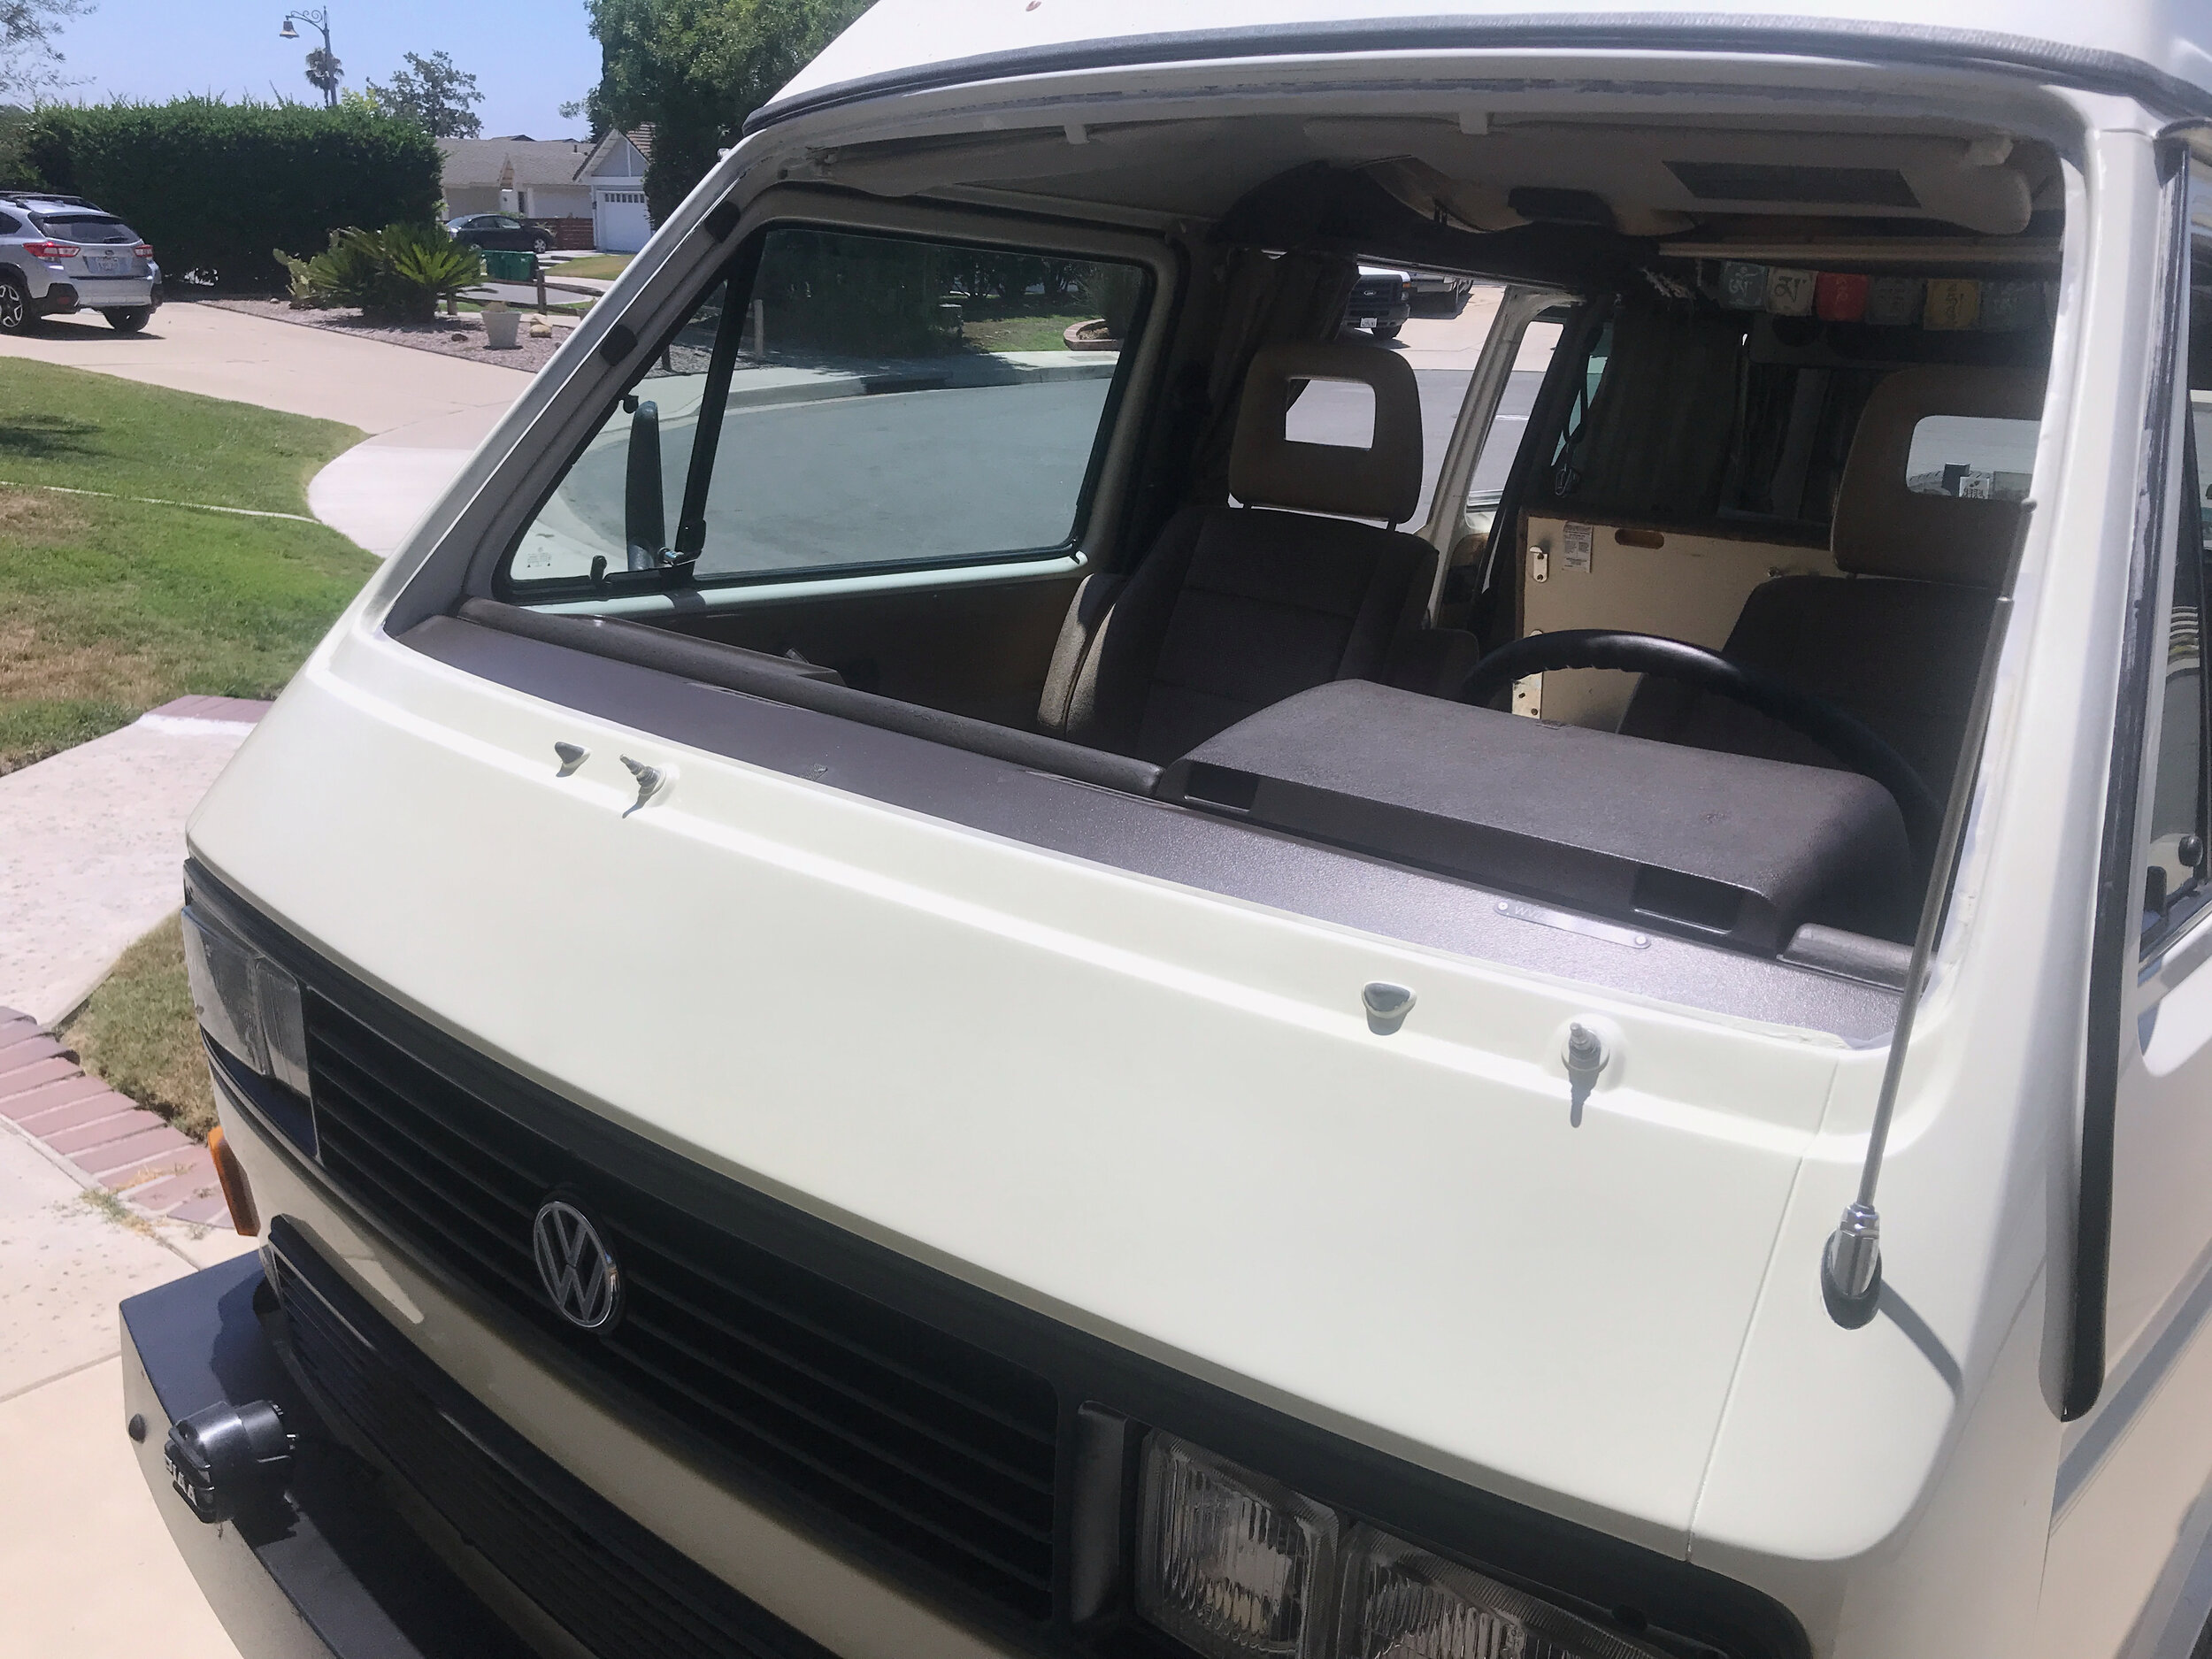
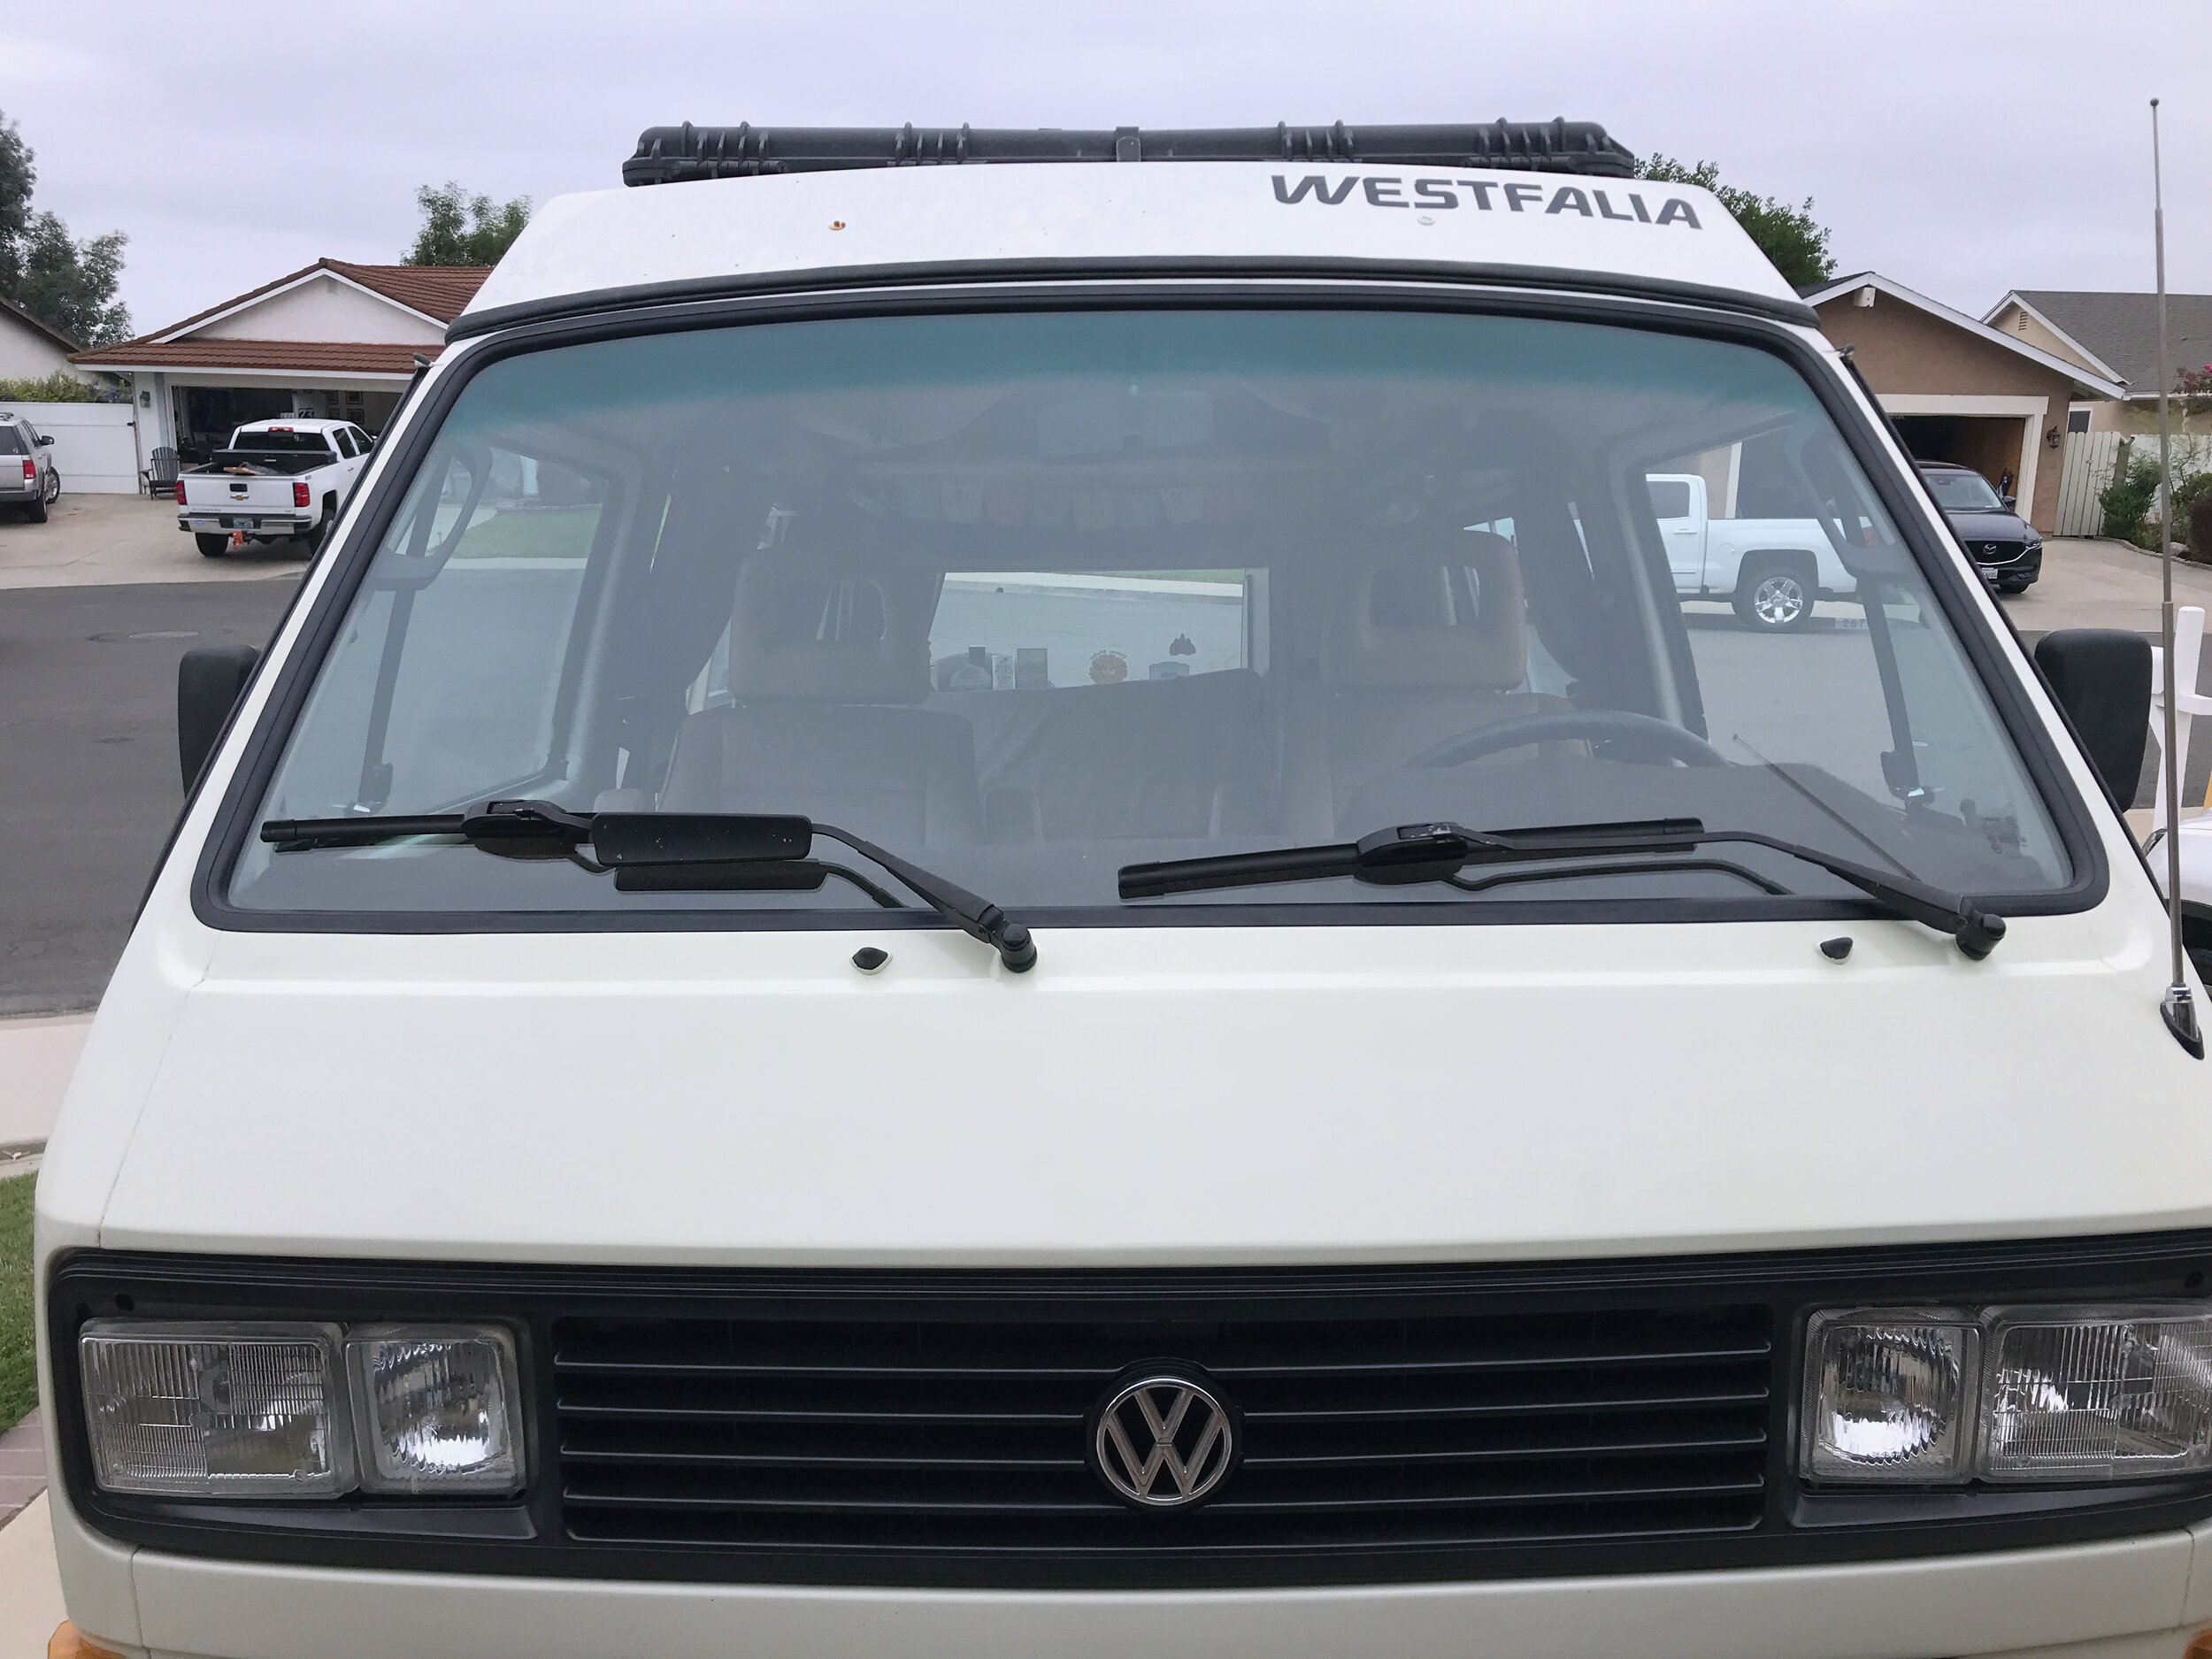
Arrows point to the locations where rust was eating away the metal. With a new windshield, seal and a bit of bodywork it’s now as good as new… well almost. I was quoted more than $1,000 to repair the rust under the windshield, and that was an estimate, not the final price. I suspect it would have cost several hundred or $1,000 more once they saw the real damage rust had done. I don’t think they would have done half the job I did. I repaired it for under $700 and that included the welder/patch panel pieces. If the body repair shop says they can repair any rust be absolutely sure they are prepared to weld-in patch panels. If they say they don’t do that, run away as fast as possible.
One tip I will pass along is to use a “sanding block.” These sanding blocks are designed for automotive bodywork. Here’s a link to a few I found on Amazon. If you don’t use a sanding block during some of the sanding processes you risk creating an even surface in your filler or spot putty. You can find a sanding block here. Again, a sanding block will prevent digging into the fillers.
On a side note: I discovered several online touch-up paint companies that will color match your vehicle’s color. It’s difficult to find the correct color match. There is no way to perfectly color-match 30-year-old paint. The best you can do is come close. Automotivetouchup.com is the one I’d recommend. I tried another called PaintStratch.com, and while they delivered fast their product didn’t come close to matching the original color. Based on my experience Automotive Touch Up is the best when it comes to matching old colors.
Step 14) I made sure I was working in a well-ventilated area before spraying the primer and paint. Don’t do it in bad weather, and especially not if the wind is blowing.
I found that spraying two coats of color worked for me. You can wet sand between coats.
I waited several hours for the first color coat to cure, before applying another coat. I waited 24 hours to spray the final clear coat.
Enjoy the process.